Nail your next meeting with a (future) boss by looking the part! Here, see professional tips for what eye shadow shades and lipstick colors are most appropriate.
Get latest information about feminine, girl, woman, mother, fashion, beauty, health, parenting, food, and house in Feminine Blog
Showing posts with label Beauty. Show all posts
Monday, 13 May 2013
Monday, 21 January 2013
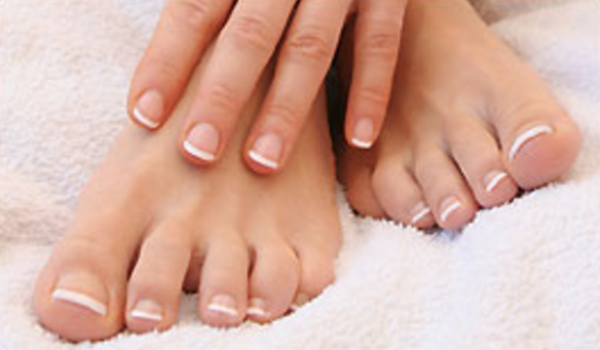
10 Tips for Nail
Labels:
Beauty
Friday, 18 January 2013
Drew's must-have new make up line
Labels:
Beauty
Tuesday, 11 December 2012
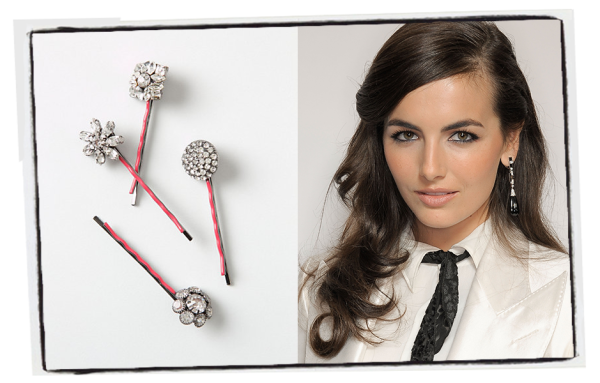
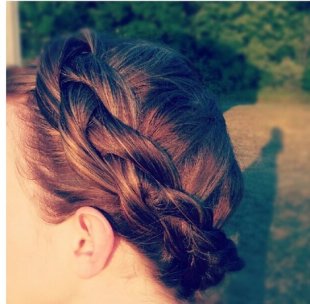
Ten-Minute Holiday Hairstyles
Labels:
Beauty
Friday, 7 December 2012
6 Beauty Tricks to Amp Up Your Holiday
Labels:
Beauty
Wednesday, 5 December 2012
5 surprising ways people judge you on first impression
Labels:
Beauty
Tuesday, 23 October 2012
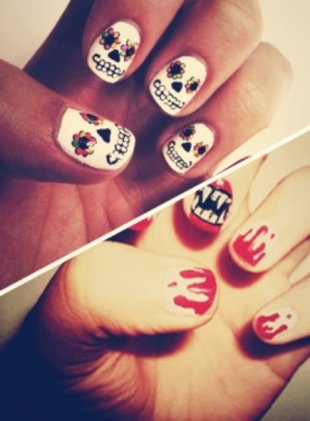
Halloween-Themed Nail Art to Die For
Labels:
Beauty
Thursday, 18 October 2012
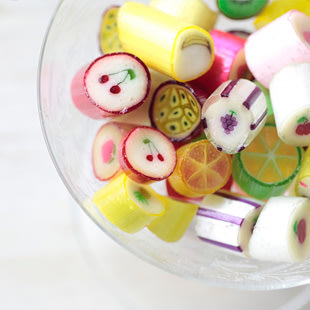
Candy-inspired beauty products
Labels:
Beauty
Saturday, 13 October 2012
Sun protection tips
Friday, 12 October 2012
10 Reasons You Don't Have the Skin You Want
Labels:
Beauty
Tuesday, 2 October 2012
Chic, Simple Hairstyles Anyone Can Do
Labels:
Beauty
Saturday, 22 September 2012
How to Get Rid Of Acne
Labels:
Beauty
Wednesday, 29 August 2012
3 Steps for the Perfect Cat Eye
Have you mastered the cat eye? I love the big, dramatic, liquid-liner look, but-depsite asking tons of makeup artist their secret-I've never been able to DIY without looking like a rockabilly wannabe. Until recently! Here's my fave new way to create a perfect, subtle cat eye:
Labels:
Beauty
Monday, 30 July 2012
5 Melt-Proof Makeup Tricks to Beat the Heat
1. SKIP THE SOAP
and switch to a non-drying cleanser as a summer-beauty starting point. Harsher products "speed up oil to 'normalize' the skin's surface," explains Freedman, who recommends Neutrogena's classic amber face wash instead. "Use something cleansing, but not stripping."
Labels:
Beauty
Sunday, 29 July 2012
7 Ways I Learned to Love the Hair that Pregnancy Left Behind
You know, the hair I used to have thinned out on purpose because it was so full and voluminous? The hair I had before two pregnancies, PCOS and a wicked hormone treatment? Yeah, as long as you don't compare my current hair to that hair, I have really good hair.
Labels:
Beauty
Tuesday, 24 July 2012
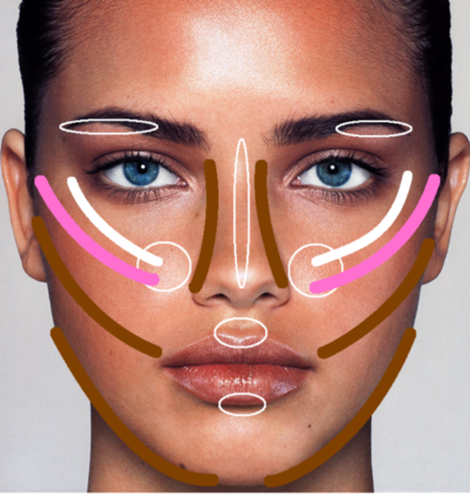
How to Contour Your Face like a Celebrity
Having a round face myself, I learned these tricks to help certain features stand out. Using these simple techniques, you'll be able to emphasize your angles using bronzer, blush, and highlighter:
Labels:
Beauty
Tuesday, 26 June 2012
7 secrets to the daytime cat eye
My signature makeup look is the cat eye and I've been wearing the winged eyeliner for the last ten years. OK, obviously I didn't invent the look. (Case in point: Lauren Conrad and Adele.) Now, every girl I pass on the street is stealing my eyeliner style. Even my closest friends have hopped on the bandwagon.
Here's the thing: I'm not upset that the trend has exploded. The embarrassing truth is that, I a self-proclaimed cat eye expert am mortified that so many gals have far superior winged styles than me.
I had to know what these women were doing that I wasn't. So I chatted with celebrity makeup artist Jake Bailey .He does Katy Perry's makeup, so I figured I'd be in for some great tips (and he didn't let me down). If you are as obsessed with the cat eye as I am, check out this tutorial that makes creating an amazing-looking cat eye a cinch.
CHOOSE the right LINER
You're not going to be very successful if you try to scrawl across your lids with a dried up eyeliner pencil, you need something that will easily glide over your lashline. That's why the most obvious cat eyeliner is a liquid formula, but it's also the trickiest kind of liner to use.
"You need so much concentration," says Bailey. "There was a time when all Katy [Perry] wanted was a cat eye, and I was so rushed but had to do them perfectly, I needed to come up with something else." Now, he uses CoverGirl Liquiline Blast Eyeliner, $6.15, an extra-creamy pencil. If you're more confident in your makeup freehand skills, MAC Cosmetics senior artist John Stapleton recommends an angled brush and a pot of cream liner.
FIGURE OUT YOUR SHAPE
You want to follow the natural curve of your eyes, so the best way to determine the right cat eye shape is to start drawing. But, "if you have downturned eyes you'll have to fake it a little," Bailey explains. Instead of following the curve of the top lid, imagine how the bottom lid would extend upwards and draw that line.
LINE THE RIGHT WAY
Stapleton suggests starting with the brush [or pencil] resting on your lashes in the inner corner of the eye. Gently drag it across, letting the line become slightly thicker as you go, until you get to the end of your lashes. Then stop.
"Then, start the tail in the opposite direction, with the tip of the brush facing your temple, and draw until you connect the two lines," he says. Either leave the cat eye thin and pointy or thicken it up by adding more layers of liner to the shape.
MAKE IT EVEN
If you work with your eyes open looking straight into the mirror, you'll easily be able to make the cat eye even on both sides from the get-go, says Stapleton. Remember, it's always easier to add more liner than take it off. If you make a mistake, use a Q-tip dipped in makeup remover to get rid of any stray marks or feathering.
EXAGGERATE the look WITH LASHES
Now that your liner is set, turn your attention to your lashes. While a few coats of black mascara will do the trick, Bailey suggests using a full strip of false lashes to enhance the wing even more. Apply them along your lashline from the inside out, but separate them from your real lashes at the outer corners. "This turns the eyes up even more," he says. And the trick is surprisingly subtle. The space (of about a millimeter) will be invisible because it's filled with liner, and when you apply mascara the lashes will all blend together.
KEEP the rest of YOUR MAKEUP SUBTLE
The old rule of thumb that you should play up one feature is especially true when it comes to the cat eye. The eyes are the focus, and everything else should be natural. Use your favorite blush and lip gloss but apply lightly, and if you feel naked without color on your lids, Stapleton suggests a nude shadow like MAC Cosmetics Eye Shadow in Blanc Type, $15. Bailey suggests leaving your lower lashline completely bare.
TAKE IT FROM DAY TO NIGHT
Now that you understand the basics of a daytime cat eye, it would be remiss for us not to tell you how to transform it into a sexy, night makeup look especially since it's so simple. "When you go out, just extend the line and maker it thicker," says Bailey. "It goes from day to night just by pumping it up." We also like to add liner underneath especially in the waterline and layer some black, shimmery shadow on top of everything for even more impact.
Labels:
Beauty
Monday, 18 June 2012
11 Beauty Remedies for Summer Skin and Hair Damage
While you've been spending your summer safely soaking up the sun's rays, your hair and skin have taken a beating. Here's how to work rehab on your worst post-summer beauty problems, from lackluster locks to sun-damaged skin.
1. Get Poolside Protection
You might love swimming laps, but you hate what it's doing to your hair-constant chlorine exposure dulls color and texture. Use a clarifying shampoo after each dip in the water to remove green, brassy tones immediately.
2. Keep Color From Fading
"The best way to richen up sun-bleached strands is a gloss treatment," says Friedman. "I recommend a demi-permanent color that deposits tone and shine while closing the cuticle, making the hair look and feel healthier. Plus, it will neutralize brassy tones. Another option is a color-depositing product, which tends to work best on prelightened hair. This can help maintain a cool blonde tone, keep brown hair rich, and help postpone your trip back to the salon if you're a redhead."
3. Hydrate Your Skin
"Use an exfoliating and rejuvenation mask twice a week," says Jan Marini, president and CEO of Jan Marini Skin Research, Inc. "This will refine, soften, and hydrate parched, sun-exposed skin. As a result, your complexion will look plump and renewed - and ready to withstand cooler fall temperatures.
4. Even Out Your Skin Tone
"Lackluster skin can often accentuate fine lines and conceal your true complexion," says Lisa M. Crary, CEO and owner of Santias Skincare. "Use a gentle scrub to reveal healthy skin underneath the dead cellular buildup. I recommend a physical exfoliant that stimulates new tissue growth while delivering antioxidants."
5. Trim Your Split Ends
"The ends of the hair are always the most damaged (and most susceptible to damage) as they are older and more weathered," says trichologist Philip Kingsley. "You'll also find that split ends cause more tangles since they're dry, dull, and inelastic (less stretchability). The only way to treat split ends is to trim them off! Contrary to those beauty myths, you can't physically heal a split end."'
6. Prevent Dark Spots
As you age, the sun increases melanin levels in your skin, causing you to tan (or burn) - hyperpigmentation comes along with it. Try a concentrated brightening treatment to help diminish spots and prevent future ones from popping up.
7. Quench Parched Strands
"When hair is very dry, the cuticle is open and strands feel rough-like a piece of Velcro," explains Michael Duenas, founder of Hair Room Service (a deluxe service that provides hairstyling house-calls to celebs). Use a deep conditioner with ingredients like Omega 7 and Vitamin C to hydrate hair.
8. Treat Sun Damage
Like a triple threat, an exfoliating serum works to diffuse sun spots, strengthens skin, and exfoliates to remove complexion-dulling cells. Give your mug some much needed TLC and add a daily dose of moisturizing lotion with sunscreen to your morning and bedtime beauty routines.
9. Fix Brassy Highlights
"As a colorist, end-of-summer brassy hair is an opportunity to add new dimension to your hair color," says Tracy Madaj, a colorist at Butterfly Studio in New York City. "Whether I add lowlights to create the illusion of a soft highlight or highlights to brighten up the overall color, you can really utilize what the sun has done to your hue."
10. Fight Fine Lines
You may think that your crow's feet are from too much sun, but it's squinting-not UV rays-that are to blame. Women with lighter-colored eyes are even more prone to getting lines around their eyes because of their heightened light sensitivity. Even if you're a brown-eyed girl, always wear sunglasses with UV protection.
11. Soothe Your Irritated Scalp
"Overexposure to the sun can really damage your scalp," says Head & Shoulders dermatologist Dr. Ilyse Lefkowicz. "Your scalp is the foundation for healthy hair. To bring the life back to it, minimize the amount of styling products you use, since most can cause an unhealthy buildup of oils, and lessen the use of heat tools. Also, shampoo on a regular basis - the massaging action invigorates follicles and reduces excessive sebum buildup that can lead to scalp irritations."
Labels:
Beauty
Wednesday, 13 June 2012
5 Summer Staples that Can Ruin Your Smile
You know how to prepare for most of summer's beauty challenges. Sunburn? The sunscreen is already slathered. Mosquitoes? The citronella candle's ready to burn. Frizz? Banished with a DIY beach-hair look. Now what about your teeth? Some of your favorite summer treats might be wreaking havoc and staining your pearly whites. Here's what you can do to keep your grin looking great.
1. Dangerous Drinks
Ain't nothin' says summer quite like a tall glass of lemonade. But mind your sipping-it may be sweet going down, but leaves a sour trail. The acid in citrus fruits can wear away your tooth enamel, making it thinner over time. Eventually, this erosion may even cause visible changes in the shape and texture of your teeth.
What's more, citrusy drinks can dry your mouth out. If you get that puckered-up feeling, it might mean that you're not producing enough saliva to balance out the pH level and strengthen teeth, says Michael Klein, D.D.S., a prosthodontist in New York City. Klein suggests chasing acidic beverages with water or chewing a stick of sugar-free gum to stimulate those salivary glands. It's not just drinks to watch out for: Salad dressing often contains vinegar, another acidic attacker.
2. Snacks that Stain
"Blueberries are rich in antioxidants, but they're a primary tooth-staining culprit," warns cosmetic dentist Jeff Golub-Evan. Same goes for blackberries, cherries, pomegranates and other brightly-colored fruits. His rule of thumb: "If it stains a white shirt, it will stain your teeth!"
If your cocktails contain these stain-inducing fruits or berries, sip it through a straw to keep from splashing your teeth with every swig. Or Golub-Evans suggests mixing them into smoothies with bananas, yogurt or soy milk to tone down the color. Hot beverages stain worse than cold ones, so stick a straw in an iced tea and enjoy.
3. Gap-Fillers
Ah, sweet summer corn on the cob. And what better way to get corn stuck in your teeth than by gnawing at it row by row? "People think of food in their teeth as just a nuisance," says Klein, "but it can force teeth to separate and once these spaces grow, you'll pack more food in there."
Wedged food can lead to tooth decay-not to mention embarrassing summer snapshots. Be sure to floss immediately, so you don't end up jamming it further up when the next meal rolls around. Some other invasive foods to watch out for: hard seeds and nuts, popcorn, dense meats like steak and that ultimate summer-by-the-seaside indulgence, luscious (but often stringy) lobster.
4. Sticky Victuals
You can't have a BBQ without BBQ sauce, but it's "a triple whammy," according to Golub-Evans. "Barbeque sauce is dark, hot and sticky, the worst combination for teeth. Dark colored sauces and condiments stain your teeth and hot staining foods are even worse. And the clincher is that sticky foods attach to teeth." When you reach for that moist towelette after scarfing down those ribs, remember to clean your teeth, as well. Rinse, floss or steal away for a quick brush.
The gooey news continues at night around the campfire. S'mores are a requisite, but the combination of stickiness and sugar does double damage. "Bacteria thrive in an environment that contains sugar," Klein cautions. It pays to drink water while you're snacking on the sweet stuff; it only takes two minutes for chocolate to start working away at your teeth!
5. Swimmer's Mouth
Chlorine damages tooth enamel and any bonding work by drying them out and stripping them of essential minerals, says Golub-Evans. Regular swimmers may want to learn to keep their mouths closed in the pool-and the ocean as well, Klein adds. Salt water dries the mouth, slowing the flow of saliva, which contains tooth-boosting calcium and phosphate. A good swish with fresh water helps wash out the chemicals and salt and gets the spit going again.
Labels:
Beauty
Sunday, 27 May 2012
Hair Ideas: 5 Blowout Tips from the Founder of Drybar
It's not every day you get a lesson in blowouts from Alli Webb, founder of the Drybar blowout bars. Rule number one: If you've gotten your blowouts down to 10 minutes, you're doing something wrong. (Sorry!) Webb gave me the rundown on the other most common styling mistakes-and how to get the ultimate results.
1. Shampoo.
The best styling sessions start in the shower. Shampoo thoroughly, because you want your hair to be as clean and oil-free as possible.
2. Choose the right brush.
If you're going for a smooth look, use a large-barrel boar-bristle brush. "The cork handle on Ibiza brushes is really easy to work with, and they're great at smoothing the hair," says Webb. For curls or wavy styles, round metal brushes are best. "They heat up and act like a curling iron," says Webb. While drying, constantly twirl hair back (from the mid-shaft down) using the brush. "The biggest mistake is curling your hair toward the face," says Webb. Simple reason: It'll look cheesy.
3. Don't rush.
"You really need to work in small, one-inch sections," says Webb. And dry each section completely before moving along to the next. "It takes us 30 to 45 minutes to dry a client's hair, so it should take you at least that long," says Webb. "Otherwise, your hair won't be 100 percent dry. If there's any moisture left in the hair, it will frizz."
4. Try tools.
If you can't get your hair totally smooth and frizz-free just by blow-drying, go over problem areas with a flatiron. If your waves look frizzy, wrap them around a medium-barrel curling iron (again twirling away from the face). Then gently pull down on each curl to straighten it out a little.
5. Finish with a light shine spray.
It'll make your blowout look extra professional. If you can still see some frizz, aim a lightweight hair spray at your hands, then run them through your hair.
Labels:
Beauty
Subscribe to:
Posts (Atom)